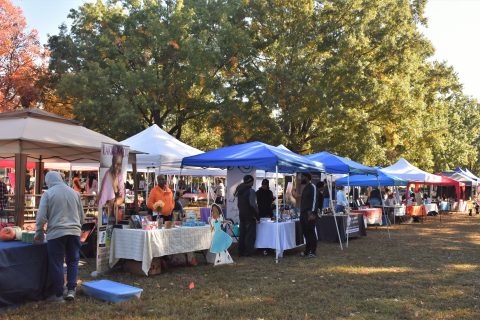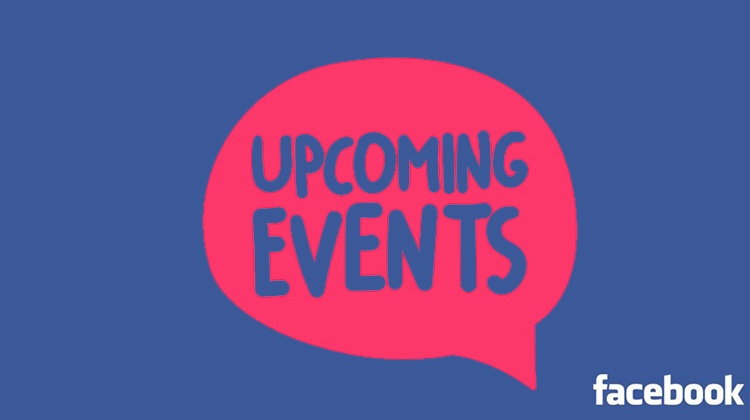
When preparing for book talks, signings, or other events, utilizing several promotional avenues can bring in a larger, more diverse group of attendees. Creating a “Facebook event” can generate hype and draw in multitudes. The venue or organization hosting you may make a Facebook event, but if they don’t, creating one yourself can be the promotional boost you need to make a good event great.
What Is a Facebook Event?
Facebook is an invaluable tool in connecting with people and spreading news. A Facebook event is a casual, high-speed equivalent of sending paper invitations and asking for RSVPs. On Facebook, you can list all event information in one place, answer questions, and spread the word beyond your immediate network.
Hosting with Your Professional Author Page
Facebook events have one or more “hosts,” who are listed for guests to see. If you have a professional author page, use it to “host” your event. This means your event will be “public,” and anyone with a Facebook account can see and RSVP to your event. Invited guests will be able to share your event with their friends, and those friends can share with their friends, and so on. People in your area browsing Facebook for upcoming events will see yours listed among others.
If you don’t have a professional author page, but use Facebook personally, you can still make a Facebook event! When you create an event from your personal page, you can make it public or “private,” which means it won’t show up on strangers’ newsfeeds, and you can opt to not let guests invite friends.
Getting Started
You can create an event from your phone, tablet, or computer, though the steps will differ slightly.
ON A COMPUTER:
- Go to www.facebook.com and stay on your homepage, or news feed.
- In the left column, under the “Explore” header, click on “Events.”

- In the left column, click on the blue button labelled “Create an Event.” Two options immediately pop up. Click “Create Public Event.”

ON A PHONE OR TABLET:
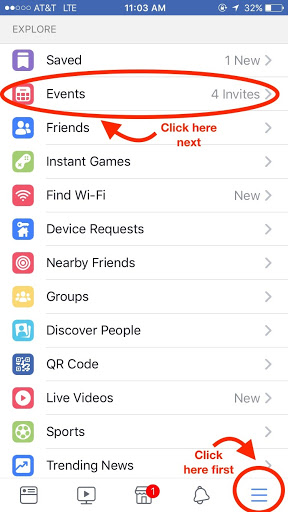
- Open the Facebook app and go to your homepage, or news feed.
- Click on the three lines in the bottom right corner.
- Click on “Events” under the “Explore” header.
- Click on “Create” in the upper right corner. Three options pop up. Click “Create Public Event.”
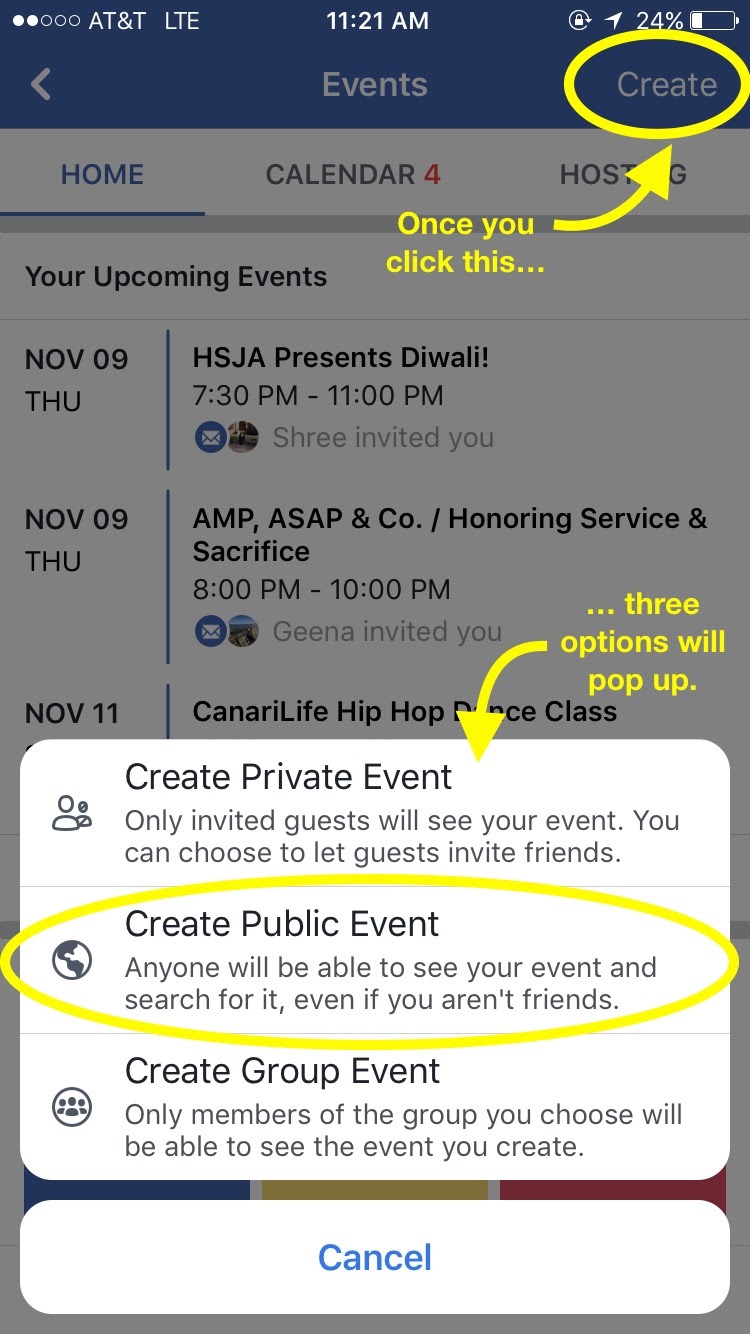
Be sure to click “Create Public Event” if you want to host from your professional Facebook page or if you want to make a public event from your own personal Facebook page. Click “Private” if you’d rather keep the audience small and intimate.
Key Information
You will now be prompted to fill in some information. These items may not appear in the order listed, depending on how you are viewing.
Event Host: Using the drop-down menu, click on your professional or personal Facebook page.
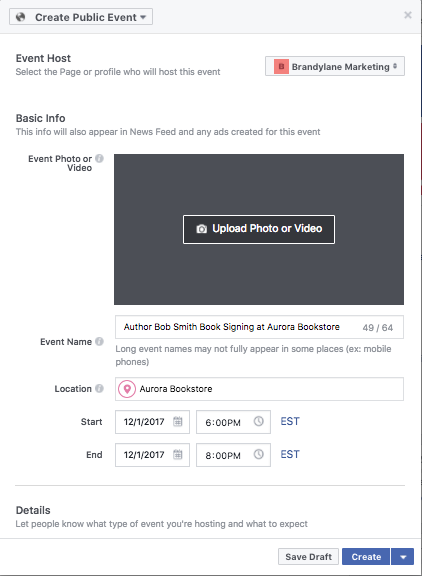 Pictures: Facebook will ask for a picture for the event. You can use:
- A Facebook-suggested image
- A photo that you took, own, or have permission to use
- A public domain image
- A graphic flyer you or someone else has designed for your event
- A themed image, which Facebook will suggest if you are throwing a private event
Event Name: Ideal names are brief and contain key information. For example, “Book Signing at Barnes & Noble” is too vague. Some people may only read the title, so make it specific and to-the-point. For example, “Mary B. Authorton Book Signing at Barnes & Noble Short Pump” is much more informative. Come up with creative alternatives to get people’s attention!
Be prepared with basic information:
- Location (often, if you type the name of a venue, Facebook will fill in the address)
- Date
- Start time at least, and end time if you have one
- Brief description of your event. Add an itinerary if there is one, detail what will take place, and include any fun details. Keep it short but compelling.
Category. This applies to public Facebook events. Yours will probably be “Art,” but may fit better under another category, depending on the event.
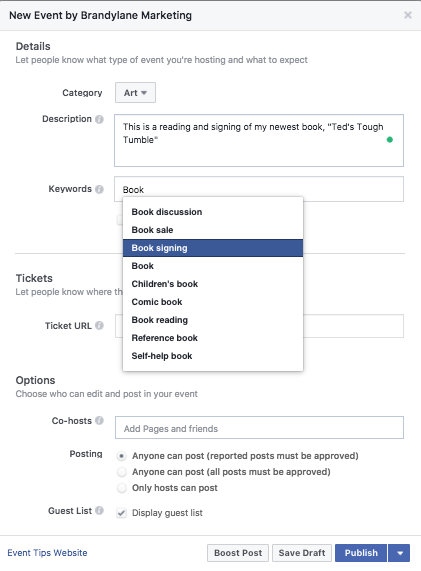 Keywords. Keywords help people who search for your event or similar events without knowing the name of your event. They may type in “book signing” or “book discussion,” so use these keywords to your advantage! Type in “book” and see what options are offered — but you only get three, so make them count! Unfortunately, you have to choose from their list, so do your best to represent your event with Facebook’s provided language.
Tickets. If there are tickets, let people know. Otherwise, simply skip over this section.
Posting and Guest List. You will also be asked about post and guest list privacy, which you can change at your discretion.
Co-hosts. You can list co-hosts — for example, the venue, other participating authors, or your illustrator. Remember that any co-host will need to also have a professional Facebook page, or you will not be able to add them.When you are done, hit “Create” to publish your event on Facebook. You will be directed to the final event page. Take a look, and if there are errors, click “Edit” under the image.
When you are done, hit “Create” to publish your event on Facebook. You will be directed to the final event page. Take a look, and if there are errors, click “Edit” under the image.
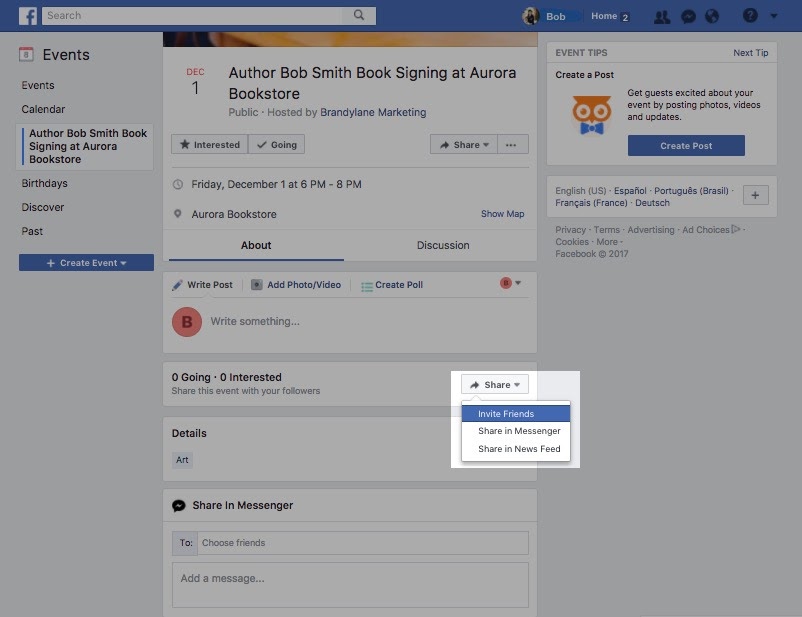
Inviting people
It’s time to invite people! Click the “Invite” button with an envelope image under your event header, or click “Share” and then “Invite friends.” Choose from your list of friends, then click “Share” or “Invite” to send them Facebook invitations.
When you invite people to a Facebook event, they may RSVP “Going,” “Interested,” or “Not Going.” It is likely that many people will not respond. This is, unfortunately, Facebook culture. A “Going” does not guarantee that person will come; a “Not Going” is usually a hard no; someone who is “Interested” will often decide at the last minute. However, do not despair! This is the nature of Facebook, and not RSVPing doesn’t mean the person will not come.
Spreading the Word
After you make your Facebook event, share it! First, inform Brandylane that you have made a Facebook event. We can use this in our own marketing.
Share the event. Periodically share on your professional Facebook page and share on your own personal Facebook page, so your friends can see it.
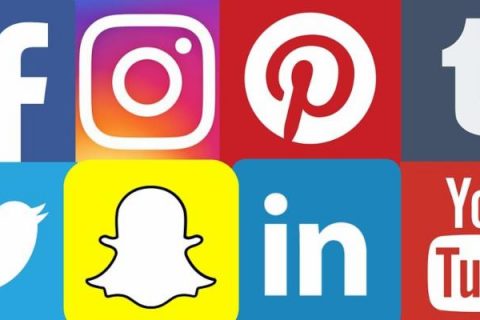
You can also share your Facebook event on Twitter, LinkedIn, your personal blog, etc. You can do this from the “Share” button on your event page, or copy the link in your web browser. Paste it into your post on Twitter or another site just like a regular link.
Use Instagram. Because Instagram is image-based, linking can be more difficult. However, you can get creative. You can temporarily change your Instagram bio link to lead to your Facebook event, and then post a graphic about your event — perhaps the same one you used for your facebook event picture — with the caption “Link in bio.” This is common Instagram language that followers will understand. Just don’t forget to change the link back to your website after the event is over!
Leading Up to Event
Post regularly. This helps build up excitement. Those who respond as “Interested” or “Going” will receive notifications about your event posts. Share flyers or other related images, fun facts, or updates directly in the event to get people interested. Consider releasing short book excerpts or other sneak-peeks. Post by going to the event page and scrolling down until you see “Write something” or “Write post,” much like you would post on your personal Facebook.
Answer Comments. If anyone comments in your event page, be sure to answer! You should get a pop-up notification through your Facebook page or app whenever someone posts in your event page, so make a point to answer in a short timeframe.
How Facebook Helps
Facebook events have a lot of perks. As long as a person doesn’t RSVP “No,” the event gets put on their Facebook calendar. Some people even have their Facebook calendars linked to their Google calendars.
The week of the event, they will get notifications reminding them of your event. On the day of the event, they will get notifications reminding them they have an event later that day. Finally, they will get reminders an hour before the event, and at its start time.
Following Up
After your event is over, Facebook will automatically archive your event. However, be sure to go back to it one last time, shortly after your event, to thank guests for attending.
Congratulations! You’re ready to take your book marketing to the next level. Facebook can be complicated, so don’t hesitate to reach out with questions!